> ## Documentation Index
> Fetch the complete documentation index at: https://support.quo.com/llms.txt
> Use this file to discover all available pages before exploring further.
# How to send texts to multiple contacts with Google Sheets and Zapier
> Learn how to use Google Sheets and Zapier to automate bulk texting in Quo without manual copy-paste work.
Want to send texts to multiple contacts using Quo? By connecting Quo and Google Sheets with Zapier, you can easily create an automated text workflow for your business.
Before getting started on bulk texting, ensure each contact opted into receiving texts either through a digital form or a physical document. As this is a multi-step Zap, you’ll also need a [Pro or higher plan](https://zapier.com/pricing) with Zapier to be able to set up.
## **How to set up the Google spreadsheet**
1. Open this [Google Sheets](https://docs.google.com/spreadsheets/d/1Vd9b1qAzmulCFx8WmGkM4S6nQUPNJUKVb7zCuW0xDLg/edit?usp=sharing) file. Click **File** **> Make a copy**. Name the file and choose where you wish to have it stored in Google Drive.
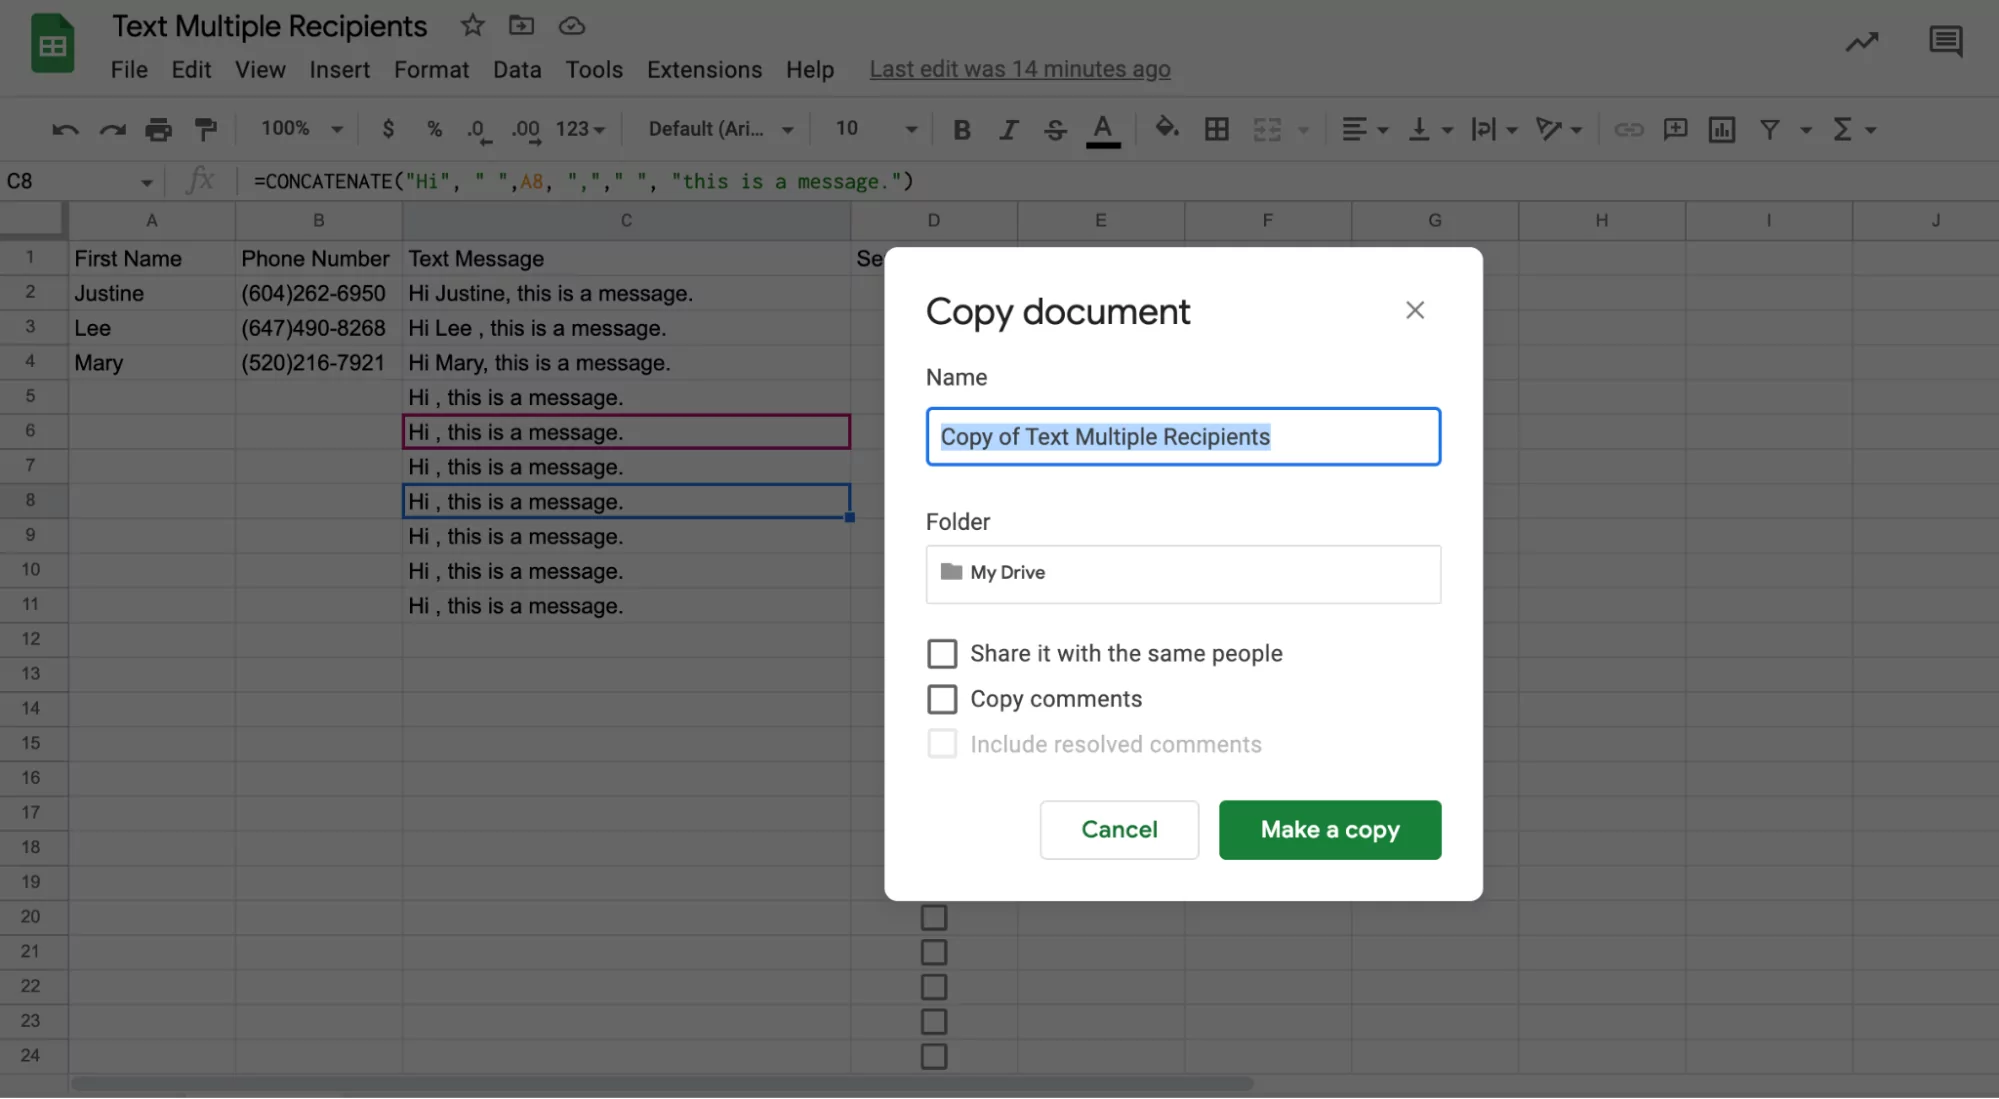 2. Add the specific contacts’ first names and phone numbers you wish to bulk text in Columns A and B.
3. Draft your text in the “Text Message” column of the Google Spreadsheet; each row represents a separate contact and their phone number so that message will need to be included in each desired row. To tweak the specific text message, you can click on the formula to the right of each phone number.
If you want the same message to go to multiple recipients, you can apply that change to every other message that would go out to other contacts by clicking the cell and copying. Then highlight the cells you want to contain that message also and paste.
2. Add the specific contacts’ first names and phone numbers you wish to bulk text in Columns A and B.
3. Draft your text in the “Text Message” column of the Google Spreadsheet; each row represents a separate contact and their phone number so that message will need to be included in each desired row. To tweak the specific text message, you can click on the formula to the right of each phone number.
If you want the same message to go to multiple recipients, you can apply that change to every other message that would go out to other contacts by clicking the cell and copying. Then highlight the cells you want to contain that message also and paste.
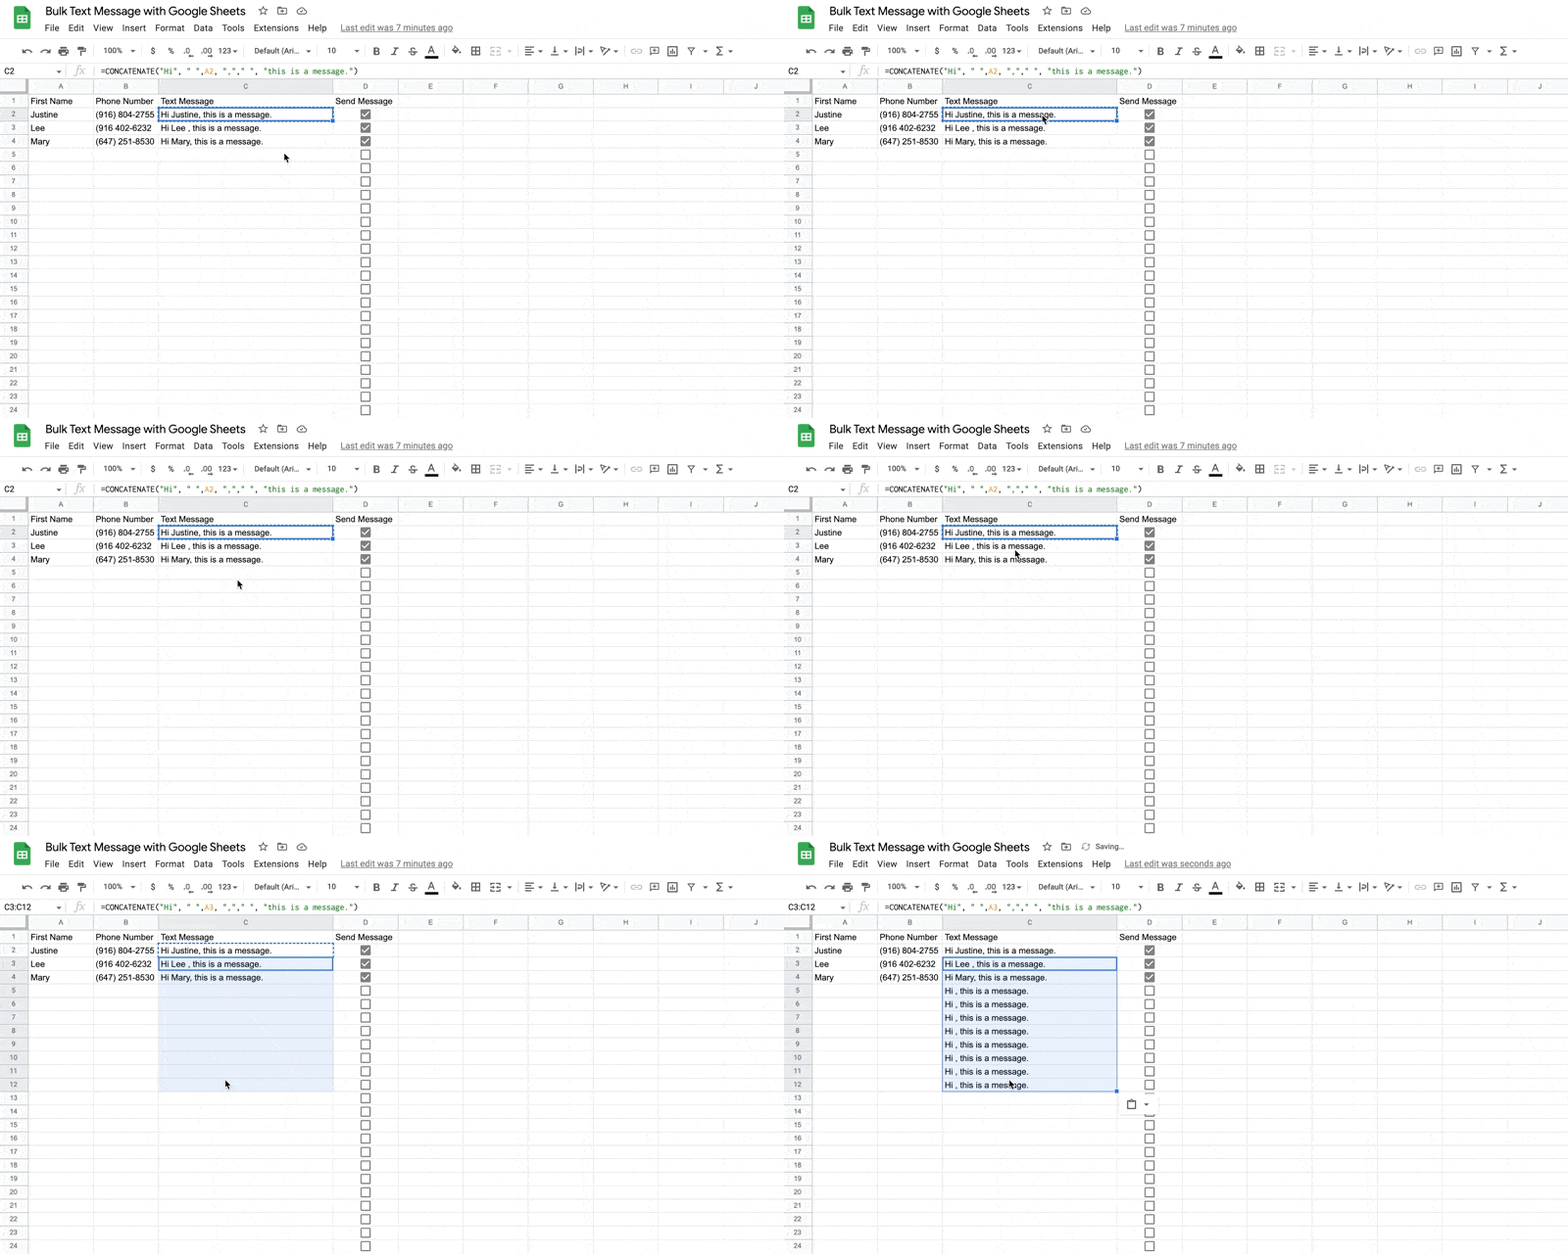 Column D lets you check which specific contacts in a spreadsheet receive a message once the Zap is set up. Hold off checking that for now until you’ve set up the Zap.
## **How to set up the Zap**
1. If you haven’t already, [sign up for a Zapier account](https://zapier.com/sign-up).
2. [Open this link](https://zapier.com/apps/google-sheets/integrations/openphone/969427/send-messages-in-openphone-with-new-or-updated-spreadsheet-rows-in-google-sheets) to work from an existing Zap template; click “Try this template”.
3. Name your Zap anything you wish (for reference later in case you ever need to update your Zap) by clicking into the top section.
Column D lets you check which specific contacts in a spreadsheet receive a message once the Zap is set up. Hold off checking that for now until you’ve set up the Zap.
## **How to set up the Zap**
1. If you haven’t already, [sign up for a Zapier account](https://zapier.com/sign-up).
2. [Open this link](https://zapier.com/apps/google-sheets/integrations/openphone/969427/send-messages-in-openphone-with-new-or-updated-spreadsheet-rows-in-google-sheets) to work from an existing Zap template; click “Try this template”.
3. Name your Zap anything you wish (for reference later in case you ever need to update your Zap) by clicking into the top section.
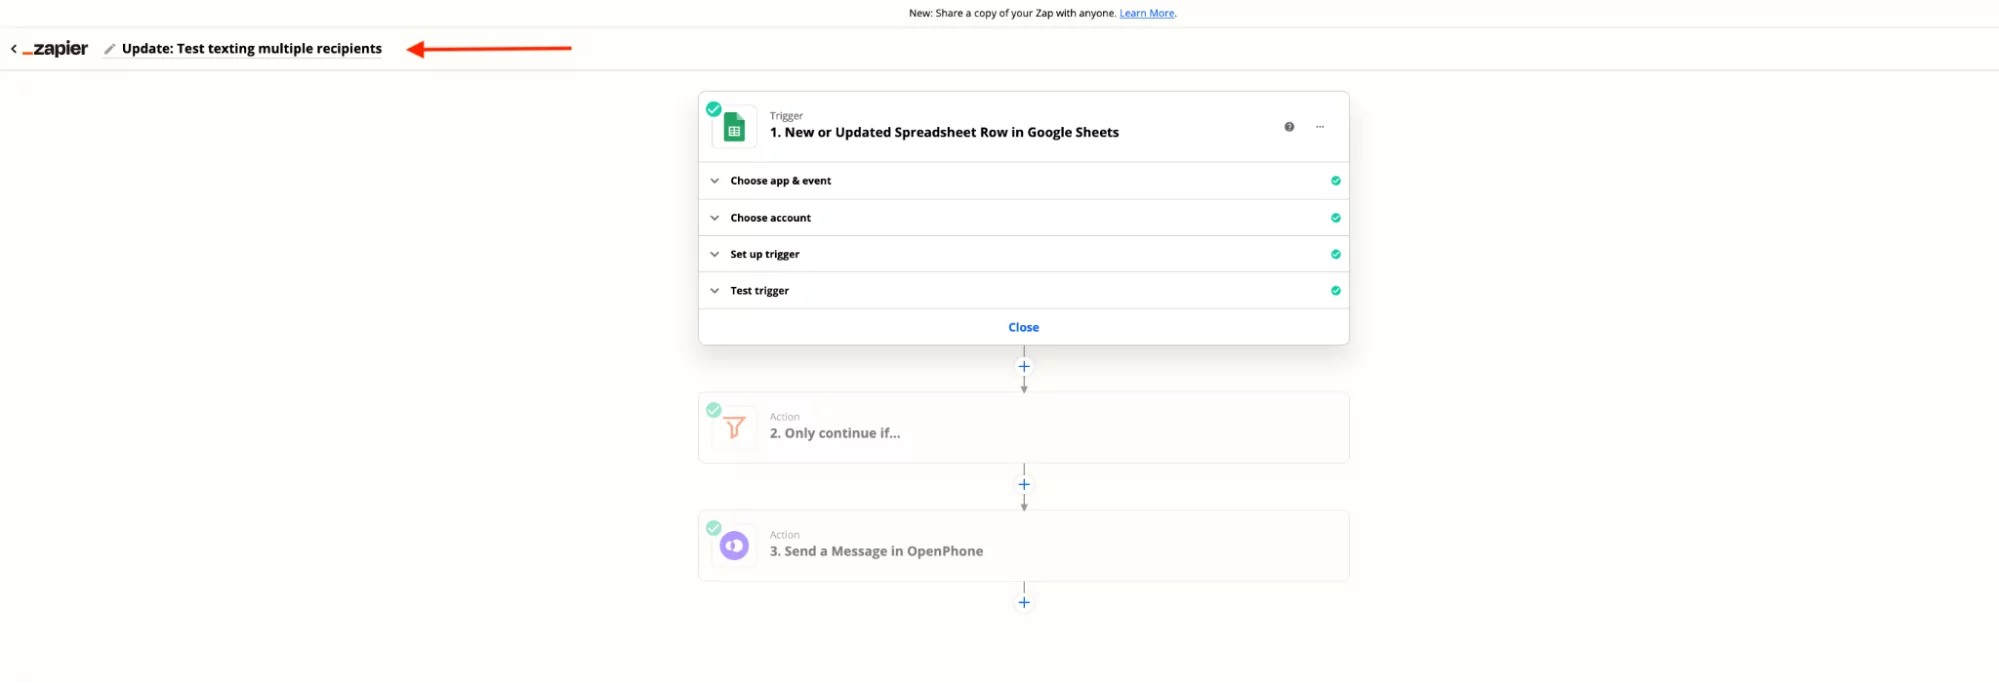 4. Click into “Trigger 1. New or Updated Spreadsheet Row in Google Sheets”.
5. Under “Choose app & event” you’ll need to choose a Google account and give Zapier permission access to it so they can use your Google Sheets file.
4. Click into “Trigger 1. New or Updated Spreadsheet Row in Google Sheets”.
5. Under “Choose app & event” you’ll need to choose a Google account and give Zapier permission access to it so they can use your Google Sheets file.
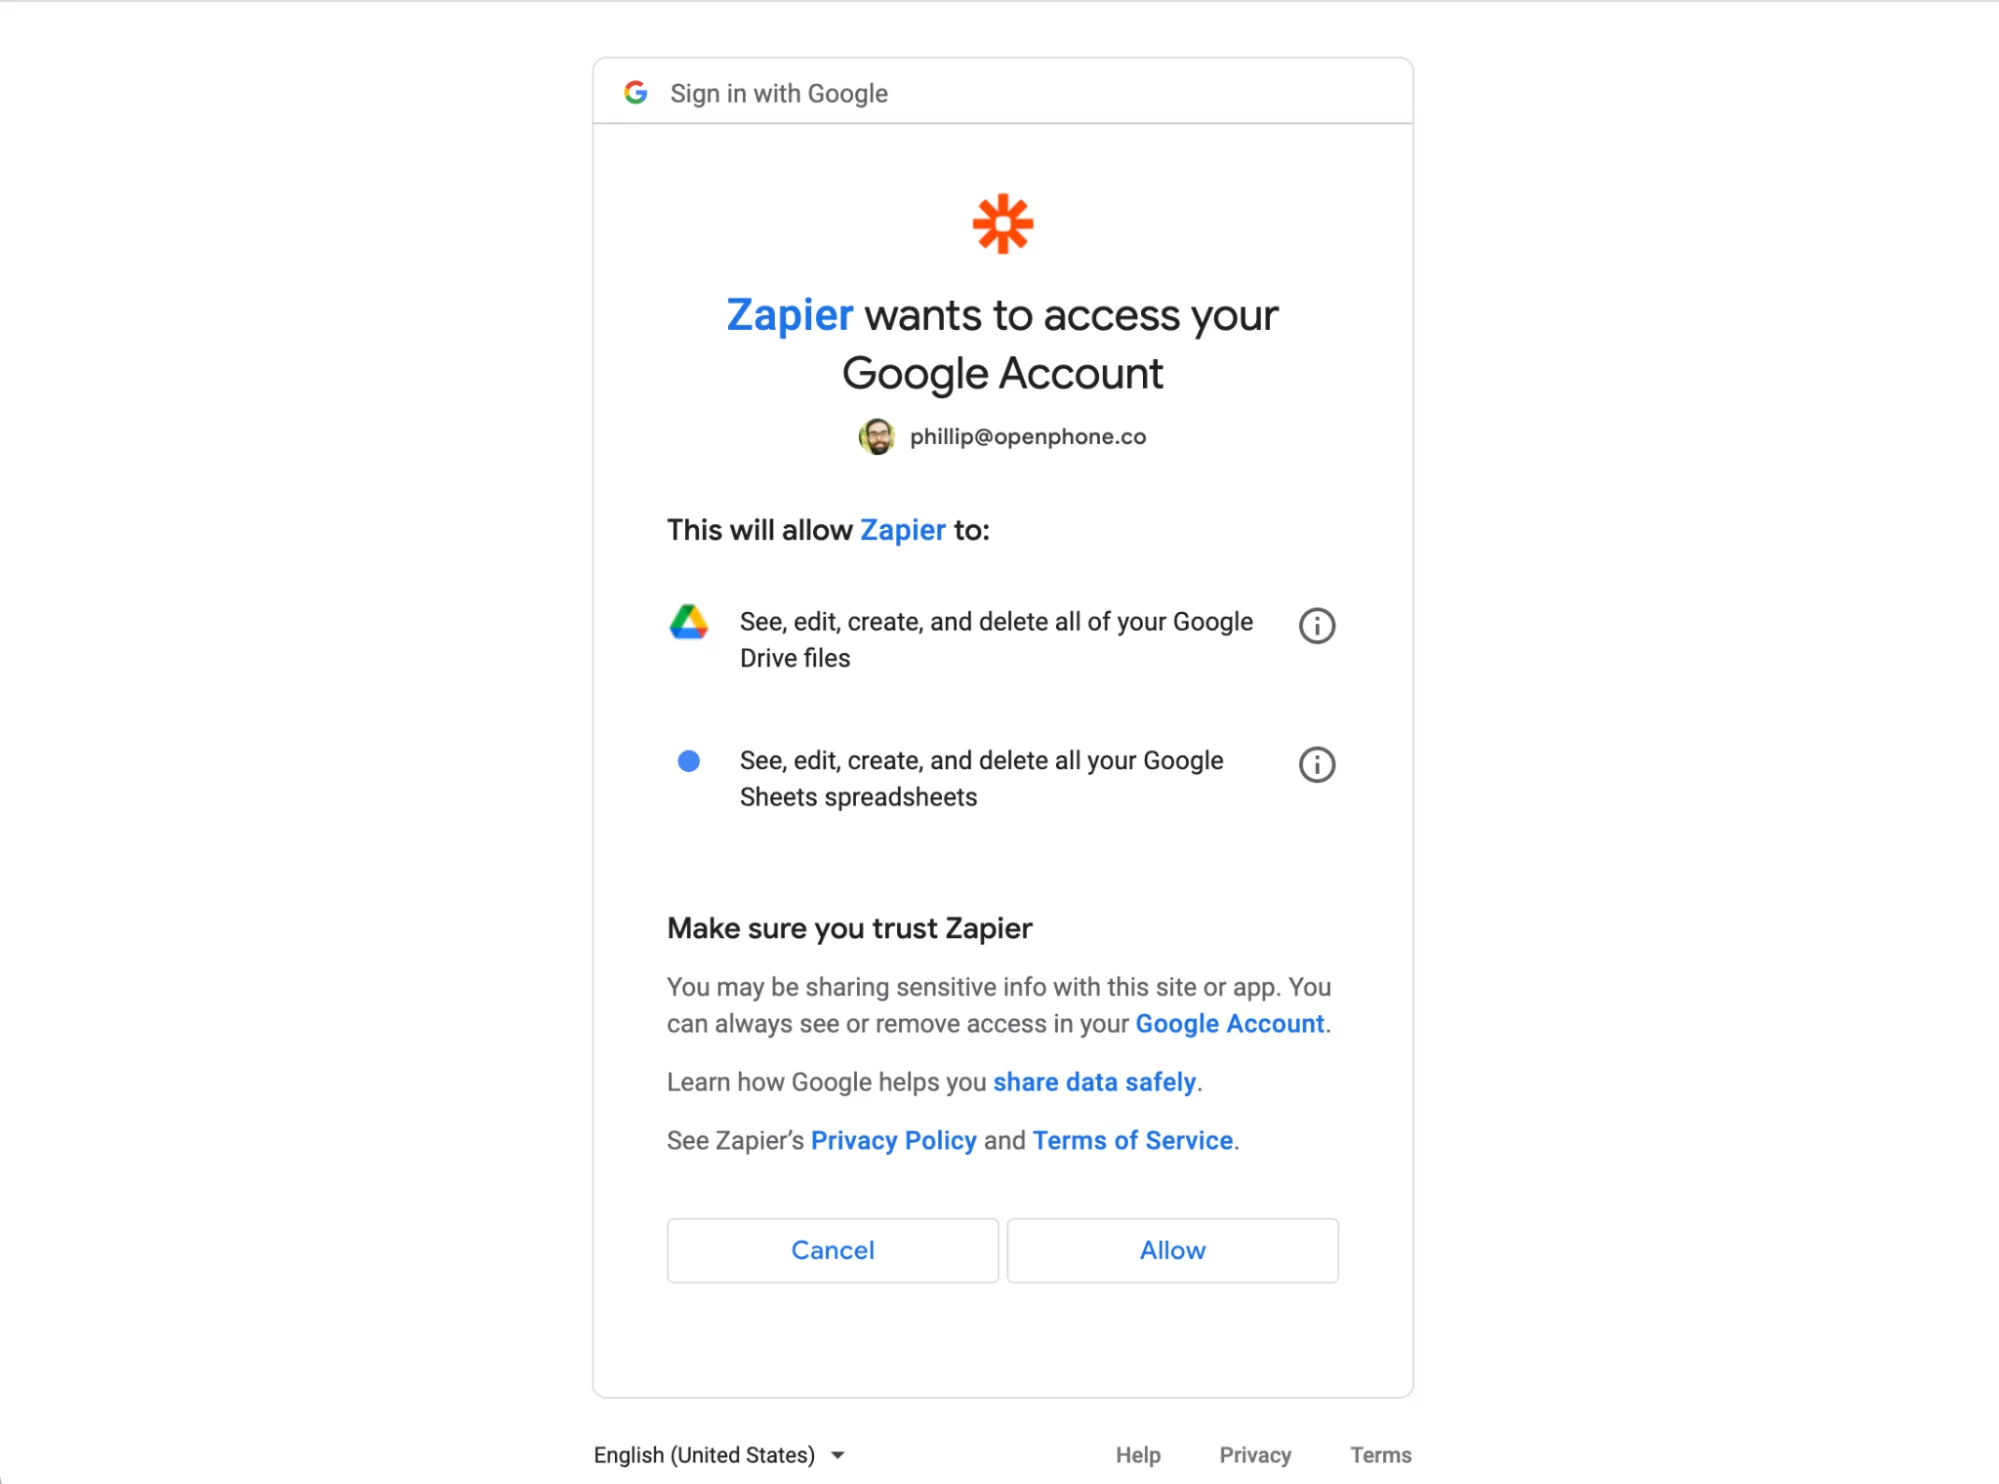 6. You can then hit “Continue” in Zapier to specify which spreadsheet in your Google account you want to use for this Zap.
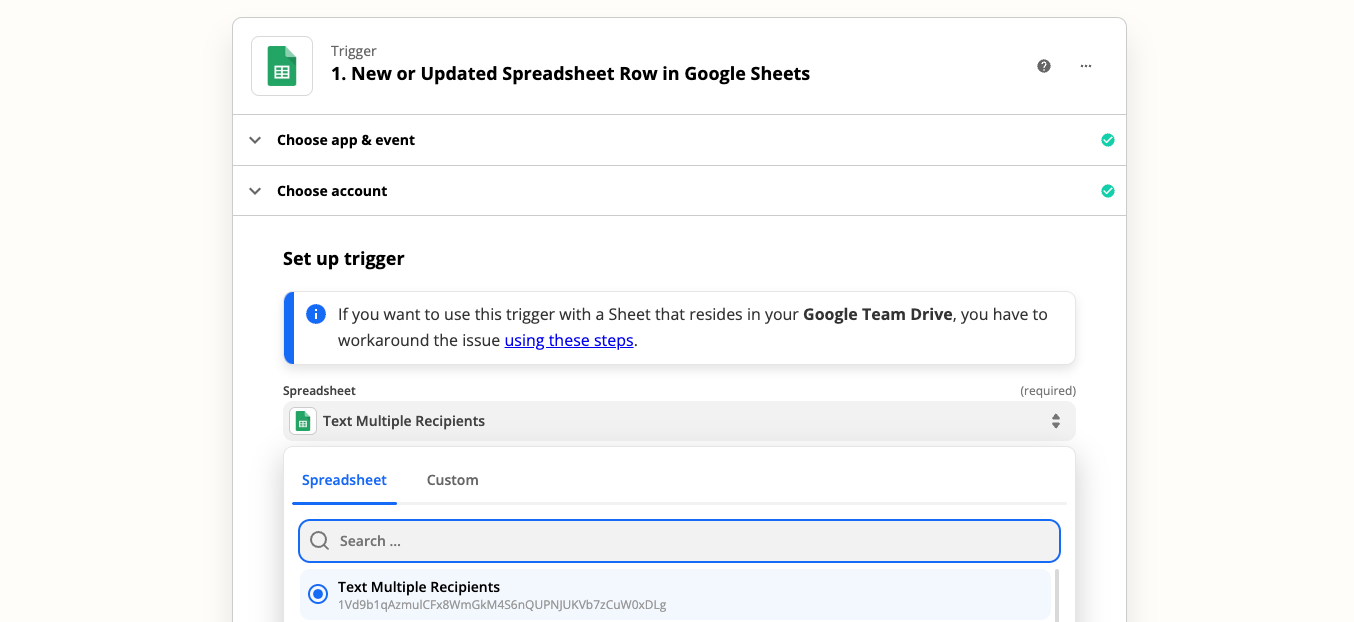 7. Below that you can specify the specific worksheet you wish Zapier to use. In this case, select “Template”
8. Click into “Trigger column” and choose “Send Message”.
7. Below that you can specify the specific worksheet you wish Zapier to use. In this case, select “Template”
8. Click into “Trigger column” and choose “Send Message”.
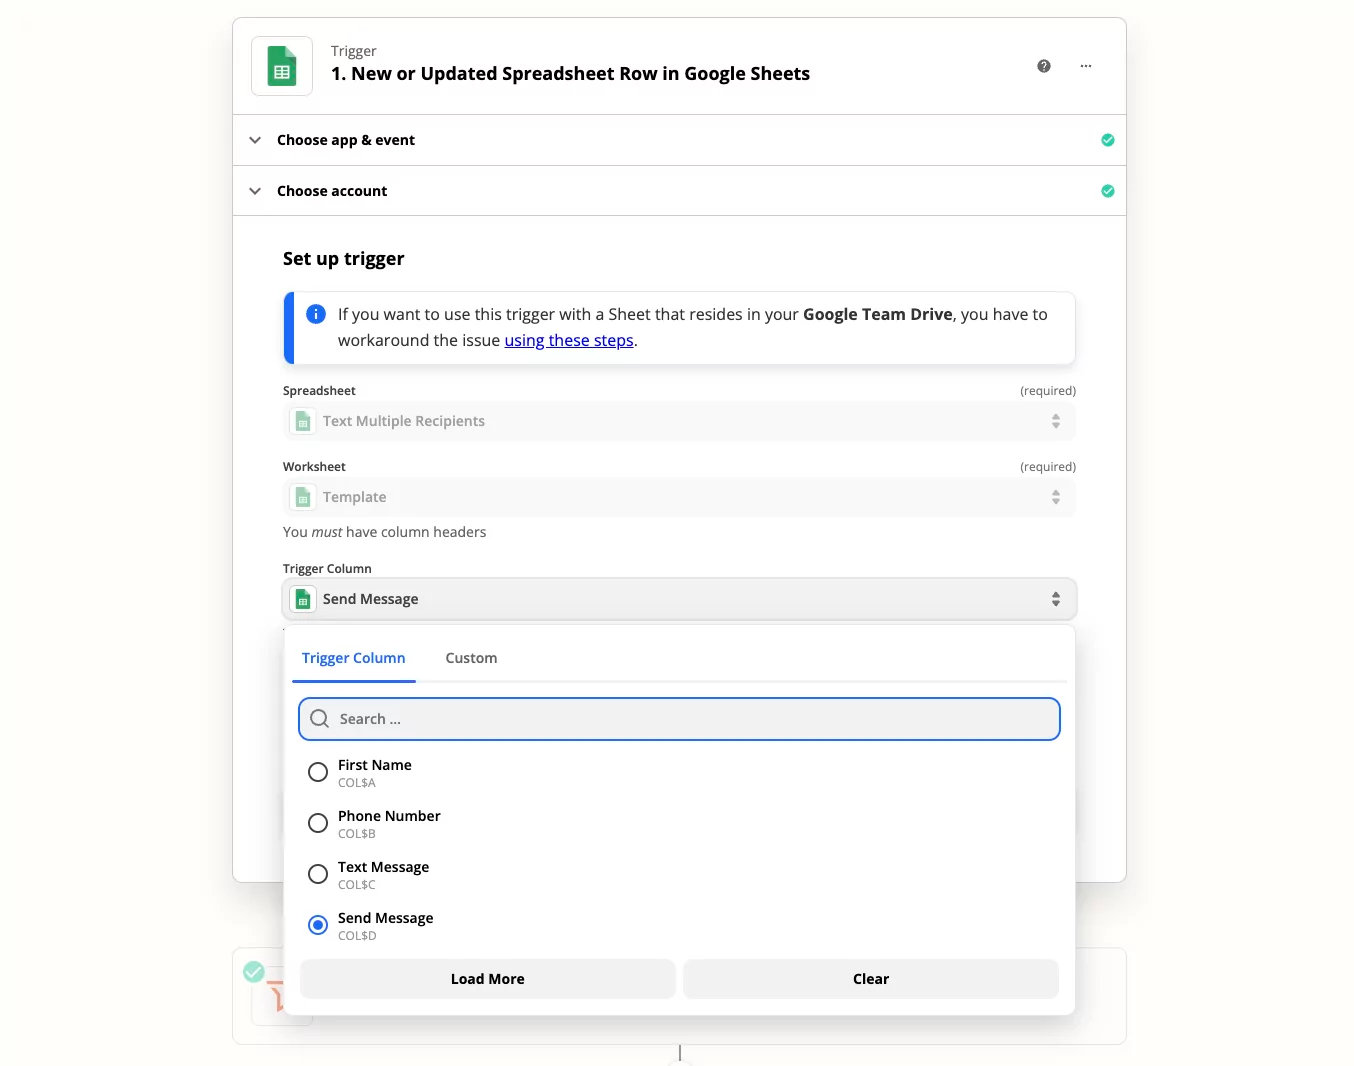 9. Click “Continue” to test the trigger.
10. Under Action for the filter. Select “Filter setup & testing”.
9. Click “Continue” to test the trigger.
10. Under Action for the filter. Select “Filter setup & testing”.
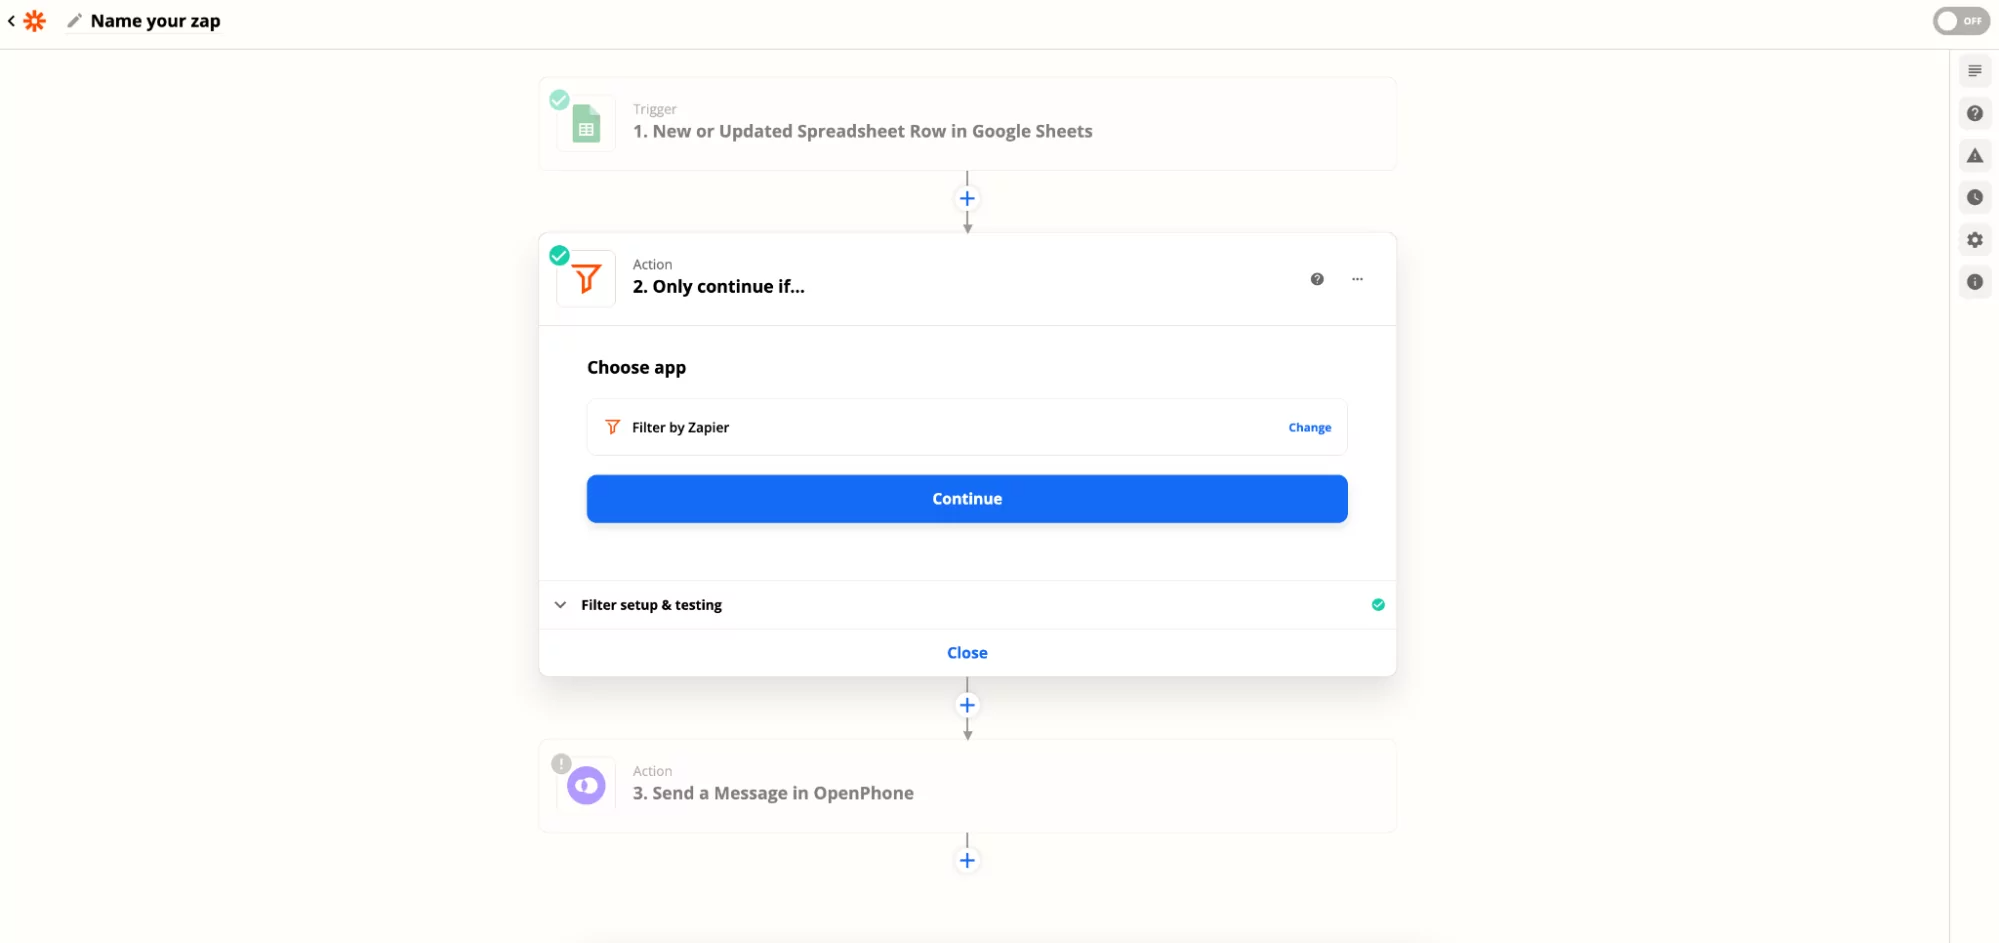 Under “Only continue if”, click “Show all options” to view all options and select “Send message”.
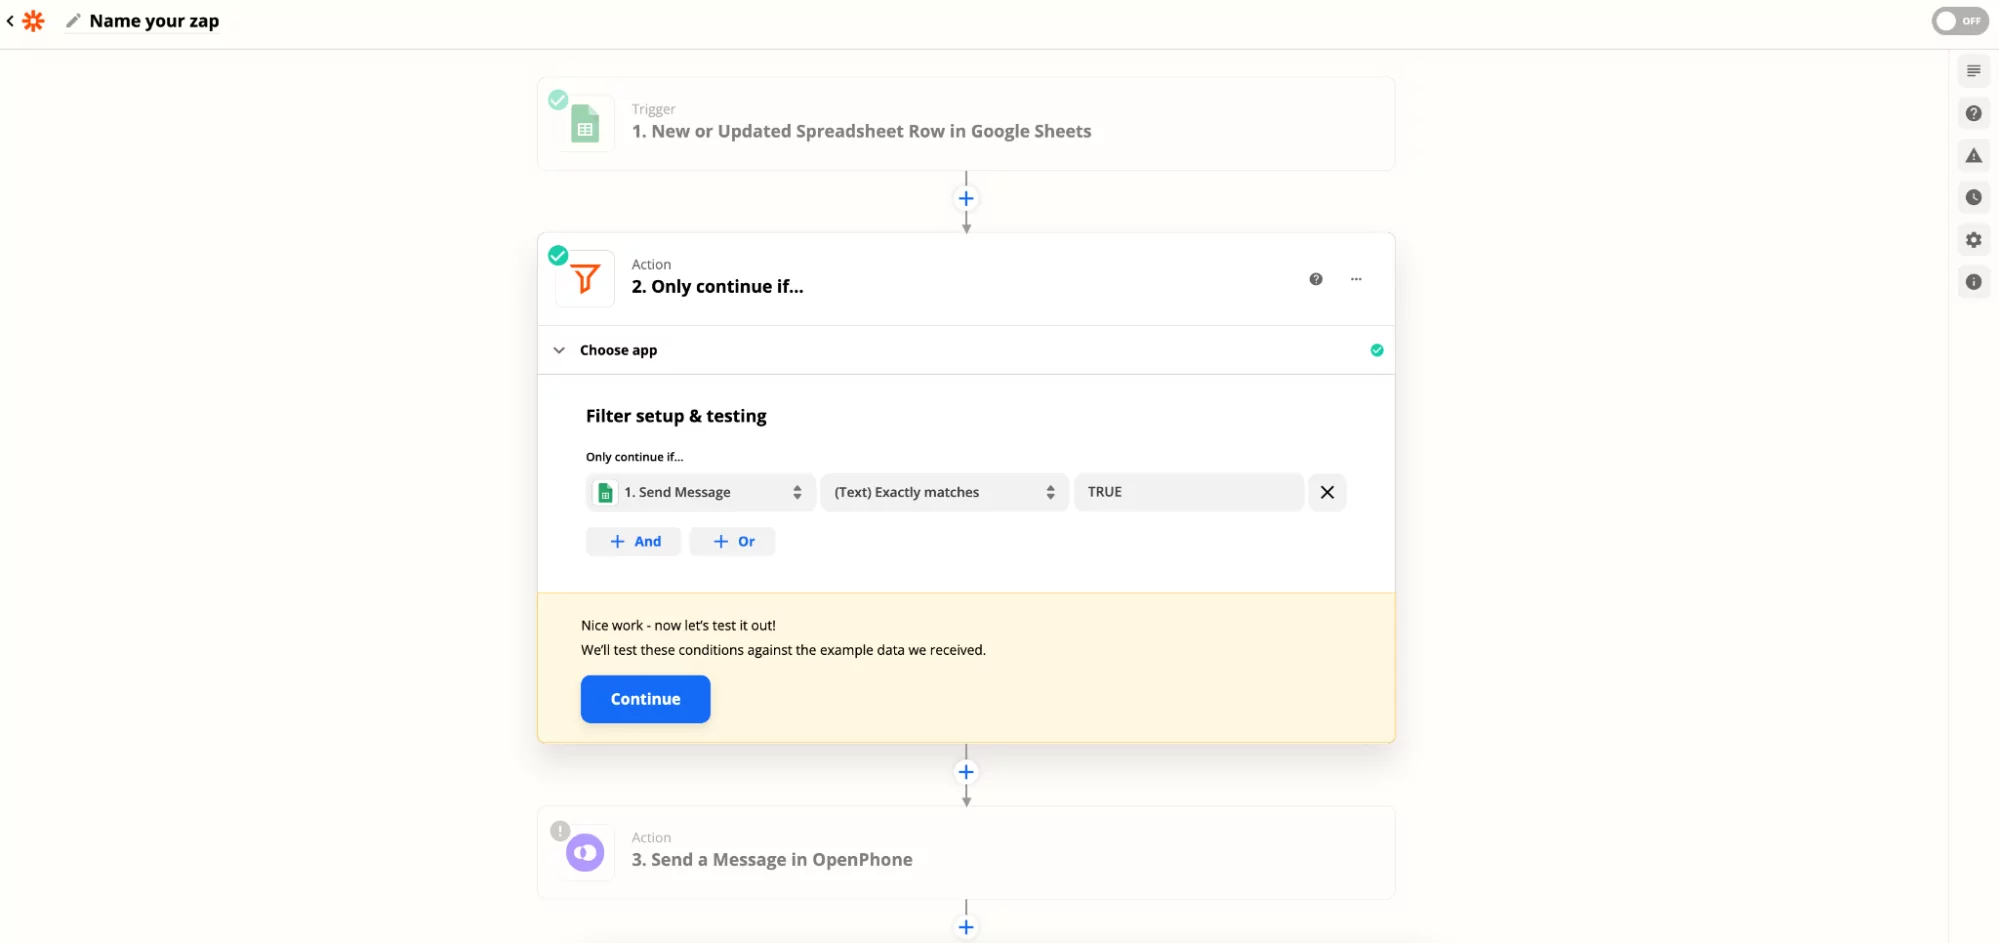 Set the second drop down to “(Text)Exactly matches”. In the third field, enter “TRUE”. That way, anyone with a checkmark next to their message in your spreadsheet receives that text.
11. Click “Continue” to test this action.
12. Click into the Quo action to connect your Quo account to Zapier.
13. Specify which phone number in your Quo account you wish to send texts from. In the “To:” and “Message” fields, add the specific columns from your Google Sheet.
Set the second drop down to “(Text)Exactly matches”. In the third field, enter “TRUE”. That way, anyone with a checkmark next to their message in your spreadsheet receives that text.
11. Click “Continue” to test this action.
12. Click into the Quo action to connect your Quo account to Zapier.
13. Specify which phone number in your Quo account you wish to send texts from. In the “To:” and “Message” fields, add the specific columns from your Google Sheet.
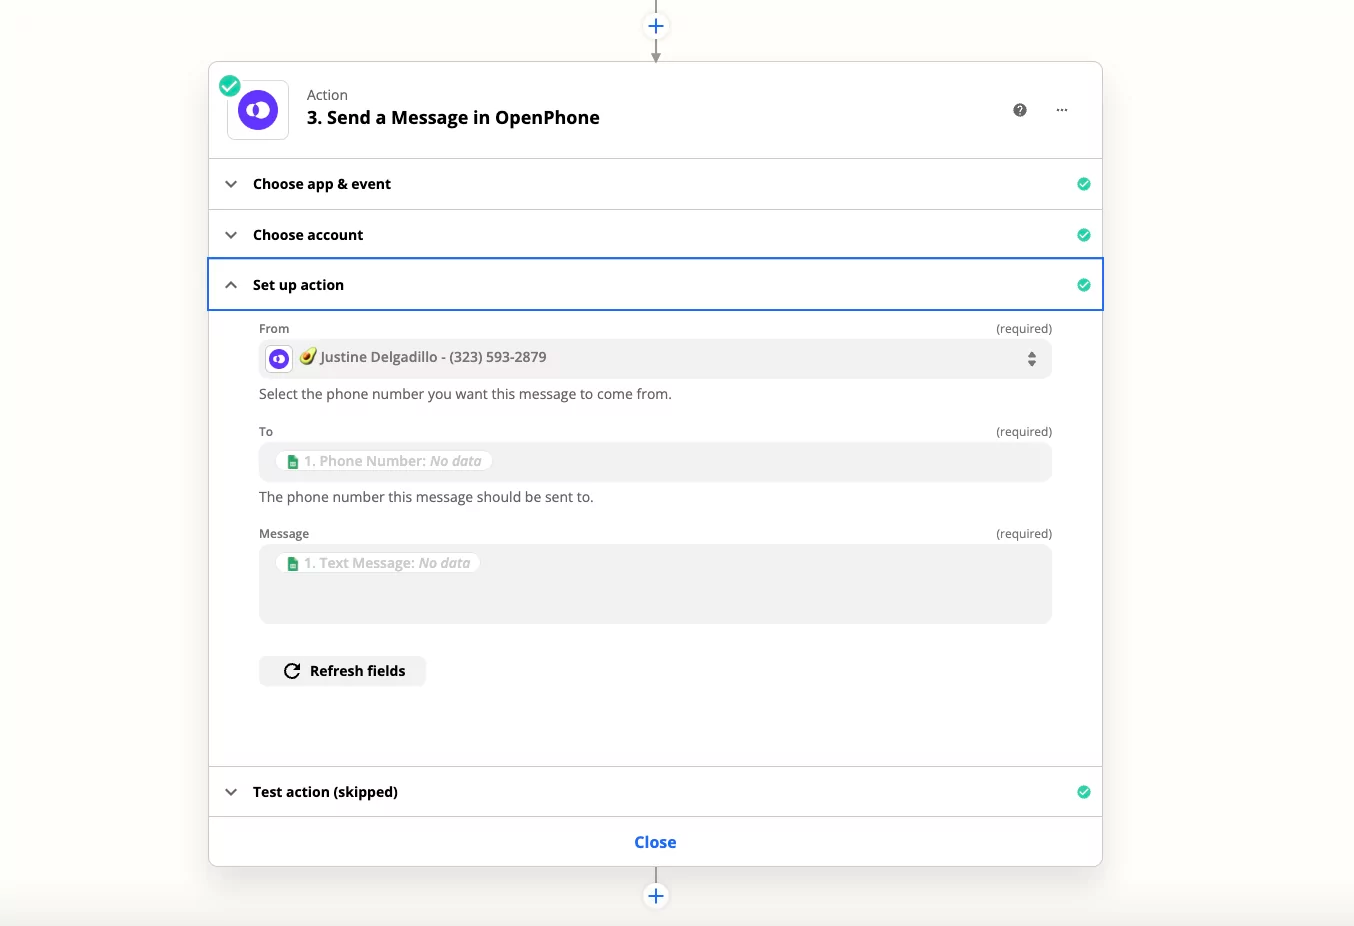 **Optional**: You can set Quo to automatically mark conversations as done after sending a message. To do so, in Zapier simply change the “Mark conversation setting as done” to “Yes”.
14. Then, turn on the Zap by clicking the toggle button in the upper corner right of the screen.
**Optional**: You can set Quo to automatically mark conversations as done after sending a message. To do so, in Zapier simply change the “Mark conversation setting as done” to “Yes”.
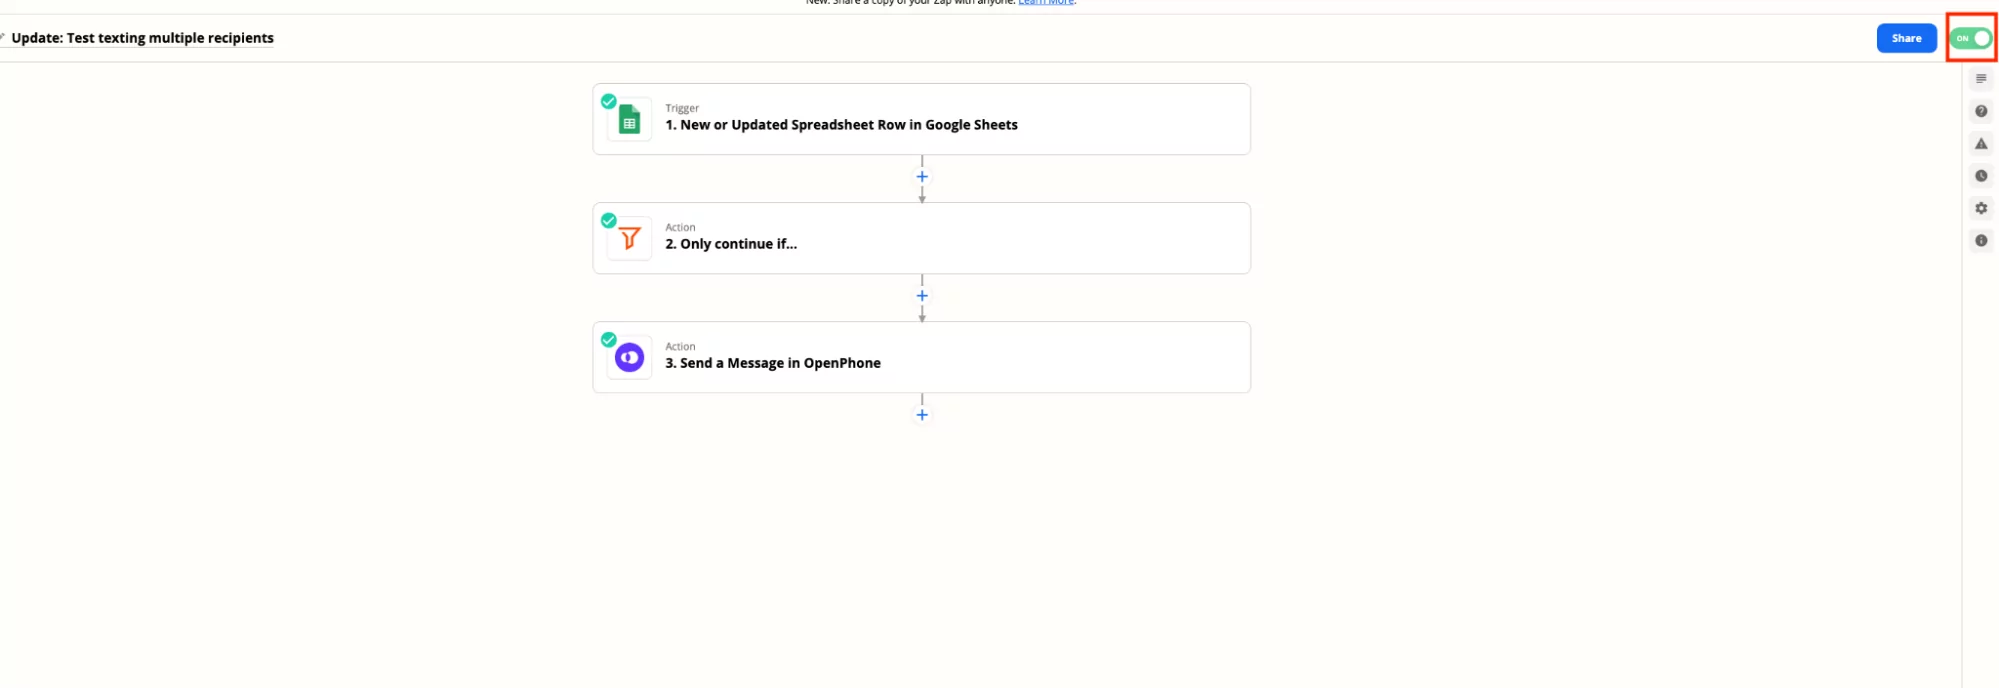
14. Then, turn on the Zap by clicking the toggle button in the upper corner right of the screen.
 ## **How to send a test text message**
To send a test text message to another number you have access to, do the following:
1. Go back to your new Google Sheet.
2. Add the phone number in Column B and a message to the right of the number in Column C.
3. Click the checkmark to send a text message to that number.
Once you click the checkmark next to any row, you won’t be able to use the same row again to send that recipient a new text message. Instead, you can add a new row in the spreadsheet with that contact’s information and your desired message. Then click the checkmark to that new row, to trigger the Zap and send the message.
## **How to send a test text message**
To send a test text message to another number you have access to, do the following:
1. Go back to your new Google Sheet.
2. Add the phone number in Column B and a message to the right of the number in Column C.
3. Click the checkmark to send a text message to that number.
Once you click the checkmark next to any row, you won’t be able to use the same row again to send that recipient a new text message. Instead, you can add a new row in the spreadsheet with that contact’s information and your desired message. Then click the checkmark to that new row, to trigger the Zap and send the message.